Cathy's Crafting Journey

Welcome to my blog, where I hope you will be inspired and want to share comments and your inspirations and tips too!! I love to create cards, mini albums, gift bags,tags, and boxes and I hope to take you on the papercrafting Journey with me!! Follow along!!

Followers

Thursday, September 27, 2012

MCCR Theme Day Thursday


Happy Thursday everyone!!  Today is Theme Day Thursday at My Cricut Craft Room, and it is my day to post a project.  Todays' project  is party elements...Invitations, decorations, and other things you would see and use at a Halloween themed Party.

     Before we get to my project I just wanted to mention the change in the "Theme day Thursday Banner and how it is  Pink.  For now and until October 15th, we will be displaying pink Banners as well as using pink in our projects in some way to remember  those who have suffered with Breast cancer and in honor of Breast Cancer awareness.

      Now for my project, I did not have any particular project in mind...no end point, no vision of what I was going to do for this.  brain freeze,  So I just grabbed come solid color card stock I got from Walmart, my Atg Gun, Gel pens and zig pen and used the cartridges that were in my Jukebox, and looked for Halloween images and let it take me where it would.   This is what I cam up with....


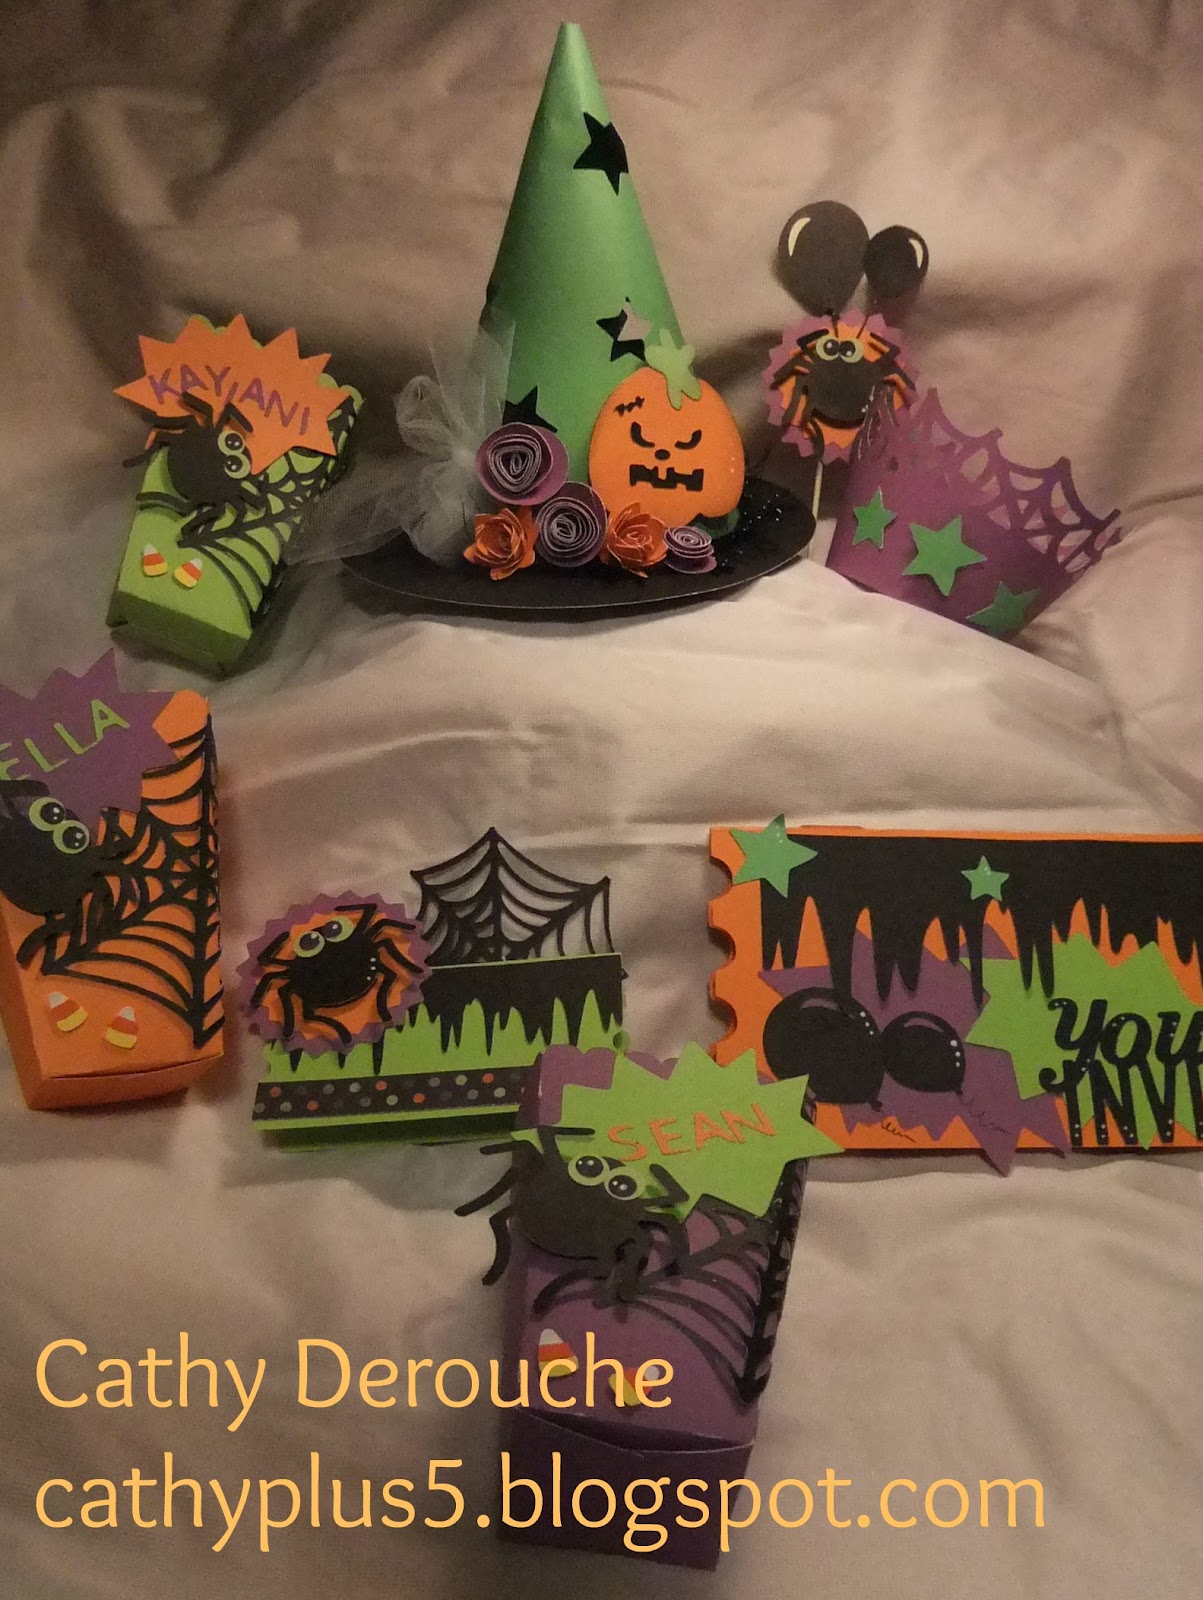
I made this project using 5 solid color card stock, orange, black, purple,bright green and white.  There is a witch hat centerpiece, a cupcake wrapper, a cup cake topper, a place card, an invitation and 3 popcorn treat boxes.


The hat was cut at 7" fro Artiste and the black base is a 7 " circle.  I adhered the green cone to the black base with Fabri-tac, because before it dried I put some frilly black ribbon around it to hide where it attached.  I then cut a strip of  white tuhle  and glued it on.  there are paper flowers cut from Art Philosophy and Artiste/  The Pumpkin was cut from Simply Scarecrow, but the face on it I got from Artiste.


  I cut the cup cake wrapper from Artiste, the one that had a spider web at the top of it.  I then put the stars that were cut from the hat onto it to decorate it a little.


And, of course you have to have a little cupcake topper... so I cut some zig zag circles and layered them with a spider and stuck some balloons on tooth picks with liquid glass, to hold them up.


 I love the little popcorn boxes you can cut with the Artiste cartridge.  they are just the right size at
 4 1/2" to put a few little goodies in.. I had bought some chocolate for when I made this to decorate, but I ate it, I am a chocoholic!  I added the names of my grandchildren on each box so I can surprise them when they come over.  I also added some Jolees Candy corns , to embellish them.


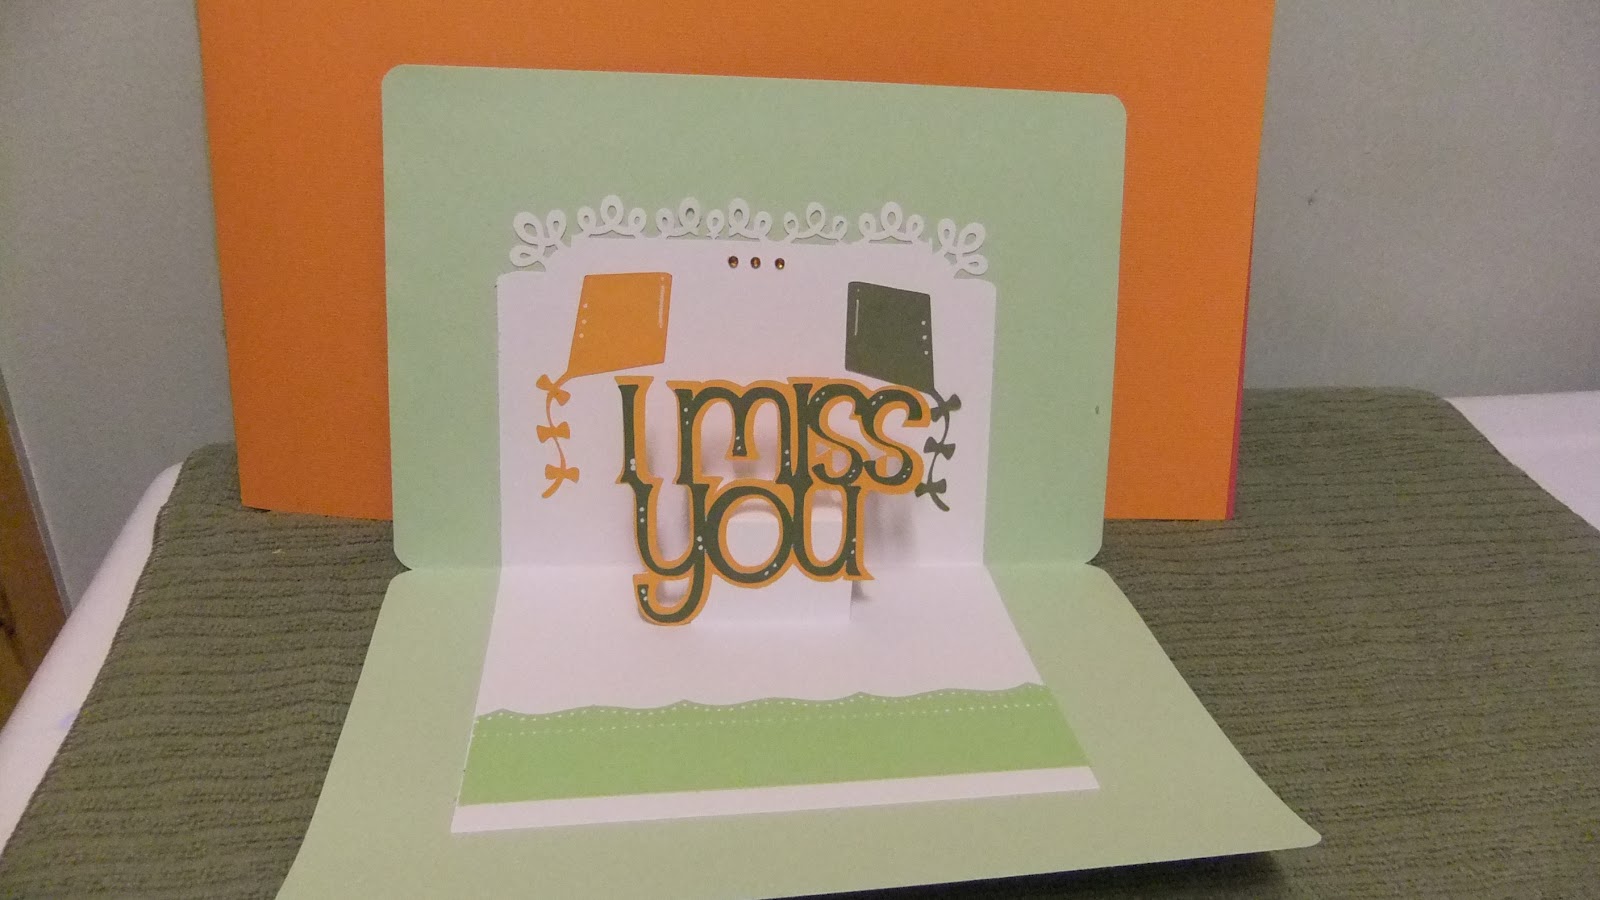
Here is the table Place card....there is a spot on the back to write a name, I think it is cute:)

This is the invitation...the card was cut from Art Philosophy.  the sentiment was from Artiste as well as the jagged edged shape.  the Black dripping goo is actually an Icicle cut from Martha Stewart Seasonal CakeArt.


This is the inside of the card.  Love the Boo!


Well we are nearing the end of today's post, but before I go I wanted to show you my Pink.
I added a dimensional sticker on the back of one of the pop corn boxes/  It has pink Ink and pink rhinestone in the middle.   I hope this post was not too picture heavy for you, I really like how it came out for not really having a plan.

Thank you for stopping by and now to see more projects like this, you will want to go to
http://mycricutcraftroom.blogspot.com

Sunday, September 23, 2012

Congrats!

Today is a quick post, the project is a congrats card.  I have been making quite a few cards lately, but been  selling a  lot of them faster than I can post them...which is a good thing!


I had not done a Congrats card in a while, and the ones I did do were all brightly colored so I decided to do one a little more subdued.  I found these beautiful wedding papers from Little Yellow Bicycle's Swoon papers.  They are such Pretty papers.  I just simply made a quick card...8 1/2 by 5 1/2/    White card stock,  white tulle, white circle for Wishing you Congrats stamp from Close To My Heart { which you can order from me:) a paper ribbon, which I love, that you can cut and put together in a flash, from the Artiste cartridge, which you also can get through me:)  I used I used a rhinestone brad to hold the bows together.


I added a few buttons on the top, whit black and w/b.  Of course used Cricut Expression 2, paper trimmer, Liquid glass from Close To My Heart. fabri_tac to hold the tulle down. and that is it. I think it is pretty, hope you like it. leave some love and stop back again:)

                                                              Happy Crafting!!
                                           Cathy


                                                      Click here to shop on my web.

Saturday, September 22, 2012

CTMH September Autumn/Halloween Blog Hop!!

                    CTMH SEPTEMBER Autumn/Halloween  Blog Hop


Welcome to OUR September Fall/ Halloween Blog Hop!  Each month we will showcasing a Theme of OUR amazing ARTISTE Cricut Cartridge which can be purchased Exclusive through your Close to My Heart Independent Consultant.

We're so excited to be doing this hop and we have a awesome lineup with some amazing talented CTMH Consultants ladies.  There will be lots of fun project along the hop!!

If you came from Sandra's then you are in the right place!
Your next stop on the hop is Candice

       Good morning to all my crafting friends:)  For sure Fall is in the air around here.  I live in the foot hills of Maine. and the evenings are getting cooler, we have even had a couple of frost advisories.  I love fall, it is a beautiful time of year around here,  The foliage is just beautiful, and the air is feels brisk and fresh.  I also love the colors of the fall flowers.  I am a flower lover, I used to plant alot of flowers, but not so much any more, so for my project today, I decided to use the Artiste cartridge to make a vase and some fall colored flowers to put in it.


The vase, I found in the booklet with the 3D images. middle row next to the last image.  It is cut at 8 and one half inches.   I used papers from a stack from K&Co , I don;t have the cover for it so I am sorry I do not have the name for it right now, I will try to find it again and post later.
The butterflies were cut from the cartridge at 2 inches and Bo Bunny rhinestones added for bling.  On each flower I cut a button flower from Artiste for the centers/

I cut several of the different flowers at 2 to 2 and 3/4 inches, from the cartridge and most of them I made at least 2 layers.


I inked the edges of all the flowers with Tim Holtz distress inks...Spiced Marmalade, Walnut and Olive.  Then I curled the edges of the petals.  I added one of my Vines I had at home to fill it in a little.  I put a sea sponge inside the vase, glued each flower to floral wires with a glue gun. and poked them down inside.
For the front of the vase I  added a couple 3D roses from the cartridge and inked them, and made a "FALL" sign stamped with Close To My Heart's September Stamp of the month set..Fall Favorites.  I inked around the edge with spiced Marmalade.  And lastly, I cut out one of the 3D bows for the front of the vase, they are so cool, they have holes in them pre-cut so you can just put a brad through to hold together the bow...Love them!!

Other supplies used:
Stickles, on leaf
CTMH Autumn Terracotta ink
atg gun
pop dots between flower layers
Cricut
Ribbon to hang it

Thanks for hopping along with us:))
Now you are off to 


Wednesday, September 19, 2012

MCCR ~~ WYEGW


Good morning everyone, today is Would You Ever Guess Wednesday,  at My Cricut Craft Room and this is my day to create something this week using as many Cricut cartridges and cuts on a project.
  I used 16 cartridges to make this Happy 13th Birthday card:)

I also want to mention before we go to my project that you will notice the graphics from today until October 15th will be pink in honor of Breast Cancer Awareness.


     On the front of the card I used Art Philosophy to make the frame on page 64 in the booklet. The square, patterned paper I used Georges Basic shapess,, the orange frame was Cricut Alphabet,  the cupcake was Straight from the Nest, The 13 in a circle is from Designer calender, the rosette is from Ribbons and Rosettes,  the gift from Stretch Your Imagination,  the Hat is from Sweet Treats and the circle is from the Robotz cartridge.


     On the inside of the card, The girls head comes from the Paper Doll Dress Up cartridge, the bubble that the sentiment is in comes from 3 Birds on Parade,  the banner above and below are form the Wrap it Up cartridge, and the Happy Birthday comes form Create A Critter cartridge,


     On the top of the inside I added a balloon from the Artiste cartridge, the lollipop from the Paisley button feature. and the banner is from Martha Stewart seasonal cake cartridge.

     That is it for the cartridges used, other materials used is of course my Cricut Expression2, zig pen, atg Gun white gel pen,black gel pen some pink rouge for the girls check in honor of Womens Breast Cancer Awareness and , some green stickles on the cup cake  and glue gun for rosette and green gems on front of card.  I believe that is it:) I hope you like all the details.  And now to see more projects like this, you will want to go over to

                http://mycricutcraftroom.blogspot.com

                      Have a great day!!

                                    Cathy


.

Tuesday, September 18, 2012

Super Marioooooo

Mario and friends Birthday


     Good evening everyone!  It is a rainy, blustery evening here in Maine, we have wind advisories here, and a few streets over the power is out already.  It would be a good night to craft, but I have a cold and I just puts some vaporub on and am going to relax.  I made a card earlier today for my eldest son who turned 30 today......boy am I feeling old.
      His name is John and when he was little he was allllll about Mario, and Luigi and the Mushrooms and Yoshi.  so I fired up the Cricut and with using just the Cricut Artiste and Art Philosophy cartridges I made him this card.  It is just a bunch of circles, Ovals. and a square used to make them, ranging in sizes from 1/2 inch to 3 inches.  If you would like the sizes, I am sure I can gather them up for you:)
       I added the 30 and blinged them up with red stickles, hi-lighted with gel pens, used Core'dinations card stock, Recollections card stock and a Birthday patterned paper from my stash of assorted papers.

     I hope you like my version of the Famous Mario and friends,   Have a great night.  come back again tomorrow for my WYEGW Design team post for My Cricut Craft Room

                                                           Happy craftin ~~ Cathy


Sunday, September 16, 2012


The Cricut Craft Room Help Guide is 78 pages and
you can download it by clicking this picture. .....

When you open Cricut Craft Room now there is a GREAT video that pops up and welcomes you to Craft Room. If you have ever been intimidated by the idea of Craft Room…. NOW is your chance. There is a 4 minute video that welcomes you to Craft Room and will help you get aquainted and NOT intimidated by Craft Room!

It really is great, no matter what your computer skill level is. Please take the first step and try Craft Room if you have not taken that step yet. I have done a few Ustream tutorials to help with Craft Room, but no one can do it better than Provo-Craft themselves!


This guide came from www.cricut.com and was assembled by
Erica’s Craft Room™ My Cricut Craft Room™
and Affordable Crafting Concepts™ Copyright 2009-2012

Visit the My Cricut Craft Room blog for 6-10 Cricut made projects each weekday.
http://mycricutcraftroom.blogspot.com


On Hello Thursday visit Erica’s blog for the projects made with the
newest cricut cartridges and the Cricut Craft Room files to go with them.
I will have a project made with them and all of the Cricut Craft Room files for them to make your crafting easier and less frustrating.

Never pay more than $34.99 for a Cricut Cartridge EVER again…..
www.shop.ericascraftroom.com

ALL Cricut cartridges $34.99 or less the DAY of release from Provo-Craft.
Create a Critter 2 & Suburbia, Now shipping
$34.99 each or $65 for both (September Bundle)
STOCK UP SALE!!!!
AND $5 shipping all weekend!
12x12 set of Cricut mats (Also work for the Imagine) $8
12x24 set of Cutting mats $12.50
Set of Regular Blades $7.50
Set of Deep Cut Blades $9


Click HERE to download this help guide.
Any suggestions are ALWAYS welcome!

Wednesday, September 12, 2012

Giveaway to share

     Good evening friends I just wanted to pop in for a minute and let you know my friend Stacey is having a great Birthday giveaway and it ends in 2 days so go quickly and check it out here. Hope your evening is going well.

      Right now  I am Playing with the Artiste cartridge I just ordered for myself. LOVE IT LOVE IT!!!   If you wan to get a copy, you can order from me on my website ..here  http://cathyplus5.myctmh.com .


I am a Close to My Heart Consultant:)  If you purchase the Artiste cartridge for $99, you also get 3 coordinating stamp sets, and 2 sheets of chipboard, and then you would be eligible to get the Stamp of the Month for $5 and also the double set of stamps  "It's Your Day"  in Celebration of national Stamping Month.  So that would be for $109.00 plus tax, and shipping you would get 6 stamp sets, Artiste cartridge and 3 sheets of chipboard pieces...Wowzers, what ya waiting for???  the September stamp of the month is so cute..

                                            Look at the adorable scarecrow stamp:)))

Have a great night and thanks for stopping by.....Cathy

Monday, September 10, 2012

MCCR Letter of the day "K"


     Good morning and welcome to my blog, for today is My Cricut Craft Room's Letter of the Day Monday.  Today we create a project with a Cartridge starting with the letter "K", or create a project with a Die cut starting with the letter "K".

     I do not own a cartridge yet starting with the letter "K", so my project starts with the letter.  Well who doesn't love fuzzy, cute little Koala's  flying Kites?


     Well I know I do, I am a fan of Koalas, they are so darn adorable with their cute lil' noses and their fuzzy little bodies:))   For the card today I used the Create a Critter cartridge, love this one, it is a go to cartridge, and the Cricut Sampler.  I decided to use the papers from DCWV Sweet Stack, Core'dianltions. and Close To My Heart's Dotty For you.

      The Koala was cut at 3" and all the accessories were cut to fit.   I used CTMH Dotty for You for the Bear and the conversation bubble mat. Core'dinations for the card base and mats.  I used a white and a black gel pen to do faux stitching.  I added a butterfly to the bubble and some rhinestones for bling:)

.
    Then for a little surprise for the recipient....inside I made it a pop-up!!

                                                                  Seeeeeeeeeee???


     I thought this would be fun. I used a Martha Stewart border punch for the top of the 8x5 3/4 mat on the inside. cut out 2 kites in coordinating colors and the phrase missing you from the Sampler cartridge, cut at 2 and 1/2 I believe.  Of course in making I also used pop dots, ATG gun and zig pen.  Here are 2 other views.


     Well, that is it:, I hope you liked today's project.  Please come back again, and I hope you will follow me if you do:)  Have a great day!!        
                                             Cathy

               To see more projects like this from my Design team sisters..pop on over to :
                                       http://mycricutcraftroom.blogspot.com

Tuesday, September 4, 2012

MCCR Card Creating Tuesday


Good morning to all my friends out there:)  Today's post is for my Design Team post for My Cricut Craft Room.  Today is Card Creating Tuesday and the theme is cards with a window.  I figured where Temps around here are getting cooler at night, and I have a few pumpkins growing, and that made me think...Autumn.:)  So that said...I used the cartridges Stretch Your Imagination and Martha Stewarts' Seasonal cake cartridge to make today's card.


I used the size 5 and 1/2 by 5 and 1/2 for this card on orange card stock form Colorbok, it gave me plenty of room  to play.  I cut the card at 5and 1/2 on page 42 in the book, and kept it on that setting to cut the windows' frame, and the leaves.  I then cut out a piece of card stock from the Bo Bunny Garden Girl Collection for a mat and used my crafting knife to cut a square in the middle to have opening for window.

 
  The next thing I did was I to cut out another card in white card stock and cut out the words "Autumn" so that the orange letters showed through and glued it to the top after I used one of my fancy corner punches, sorry, I do not know the brand, definitely going to research though:)

 
  The next thing is I wanted a few pumpkins to add to the card, I knew MS Seasonal cake cartridge had some , so I pulled it out and cut a few of them at one and 3/4 inches, one and 1/4  inches and  some at one Inch.  On the larger pumpkin I used the "cake" button  and the shift key to cut the out side design layer. Using Tim Holtz   Spiced marmalade, I inked the edges of the pumpkins and a little Walnut too.  I used white gel pen to highlight as well.   On the inside a cut another window frame and with the zig pen I added it to the back side.  on the facing side I added a strip of scrap paper I had to match the flowers and papers on the front of the card.  A long time ago I purchased some flowers on clearance at Wal Mart, they were Orange and gold with gold rhinestones in the middle of them, so I dressed up the card on corners and in center of flowers. Lastly for "BLING"  I added 3 small gold rhinestones to bottom left.
     
I believe the flowers are Petaloo, I have a big bag of assorted flowers and I believe they all came together.

So besides using my Cricut, ATG Gun and fabritac, I think that is all that I used today to create my card:)  I hope you like it and will stop back again::)


Have a fun Crafting day!!!
Cathy

To see more projects like this today you will want to go over to  http://mycricutcraftroom@ blogspot.com


Saturday, September 1, 2012

MCCR September 100 cartridge Blog Hop

Welcome to Erica's Craft Room's
100 Cartridge Blog Hop day ONE!

    You should have  started at http://mycricutcraftroom.blogspot.com  if  not you will want to go there to start at the beginning. Collectively the design team uses over 100 different Cricut Cartridges in their projects during the two days of this hop.   You won't want to miss a one!

Today I want to share with you the projects I made using the three cartridges...Paper Doll Dress Up, Straight From the Nest, and 3 Birds On Parade.  What I decided to make was some little mini albums which are made out of  ONE sheet of 12x12 paper. The first one I made I used the Paper Doll Dress Up cartridge as seen below.

                                       
Each page has a pocket for which you can put momentos or small pictures or tags.  For a tutorial on how to fold the album from a 12x12 piece of paper go here .
I used the papers from Teresa Collins, It was pretty as well as sturdy and would hold up as an album. I cut the little girl at 3 and 1/2 inches, and added some flowers at the corner with a little rose.  On the inside a I added a littl bit of bling as well from some flower stickers with rhinestones I got from a friend. The mini is folded in such a way that each page has a little pocket, in which you could put little tags, pictures or tiny keepsakes:))

Next I did another 12X12 single sheet mini with the 3 Birds on Parade cartridge.  I cut out the Wizard Bird at 3 and 1/2 inches. I used a sheet from Echo Park Springtime collection.


And Lastly, I made one with the Straight from the Nest cartridge. I used a 12x12 sheet of Close To My Heart paper, from the Sonoma collection.  I added some paper flowers and a few faux pearls.  As you may have noticed on each one I have a piece of paper with velcro dots as the closure for the minis.   I used the red tacky tape to hold the strip on from the back.


All the cuts for the album came from the SFTN cartridge.  I used the corner tags on a few of the pages and cut featers and leaves and i believe there is a nest too, to kind of go with the theme feathered friends:))
Other supplies used in making the minis is:
atg gun
Stickles
fabritac
white gel pen
Tim Holtz Walnut stain
corner rounder
corner punch
MS score board
paper trimmer
Cricut
I want to apologize for some of the pictures, I tried Picmonkey for the first time to edit my pics, and unfortunately the program gave me a hard time, but I shall not give up trying:)
I hope you enjoyed my projects today!

Next you should go to ~Tammy 

http://www.Cuttinandstampin.blogspot.com/

Here is the line up of the talented ladies:

t.com/
8. shelley http://shelley-scrapbookingforfun.blogspot.com/
9. jenn lorist http://www.jennspapercrafts.blogspot.com/ 
10. Erica's Projects http://eri
casprojects.blogspot.com/
11. Angie http:
http://crazyscraplady-angelpie.blogspot.com/

12. Cathy http://cathyplus5.blogspot.com/
13. Tammy - http://www.Cuttinandstampin.blogspot.com/
14. Samantha http://www.samanthascricutcreations.blogspot.com/
15. Nadja http://nadjarobbins.blogspot.com/
16. Lisa Carrier http://ourcraftingcorner.blogspot.com/
17. robin http://create-a-latte.blogspot.com/
18. Jessica S http://jessicascraftshaque.blogspot.com/
19. Jen L http://www.mybusycraftylife.blogspot.com/ 
20. Blog Candy http://ericasblogcandy.blogspot.com/


I hope you enjoyed your visit, be sure to come back again, Cathy